Homemade yogurt is easy to make and a lot healthier than the store bought yogurt that usually contains additives that you just don’t want to eat all the time.
Here’s my recipe for homemade yogurt, I’m sure you’ll love it as much as we do.

My friend Mona has been making her own yogurt for years, it’s so easy; you should try it she says. So here is her explanation on how she does it.:
Cook the milk and ½ cup 35% cream until it’s hot but not boiling, remove from heat and let it cool.
Here comes the pinky test; you stick your little finger in it, as she waves her pinky up in the air, it’s cool enough when you can keep your finger in it and not quite burn it.
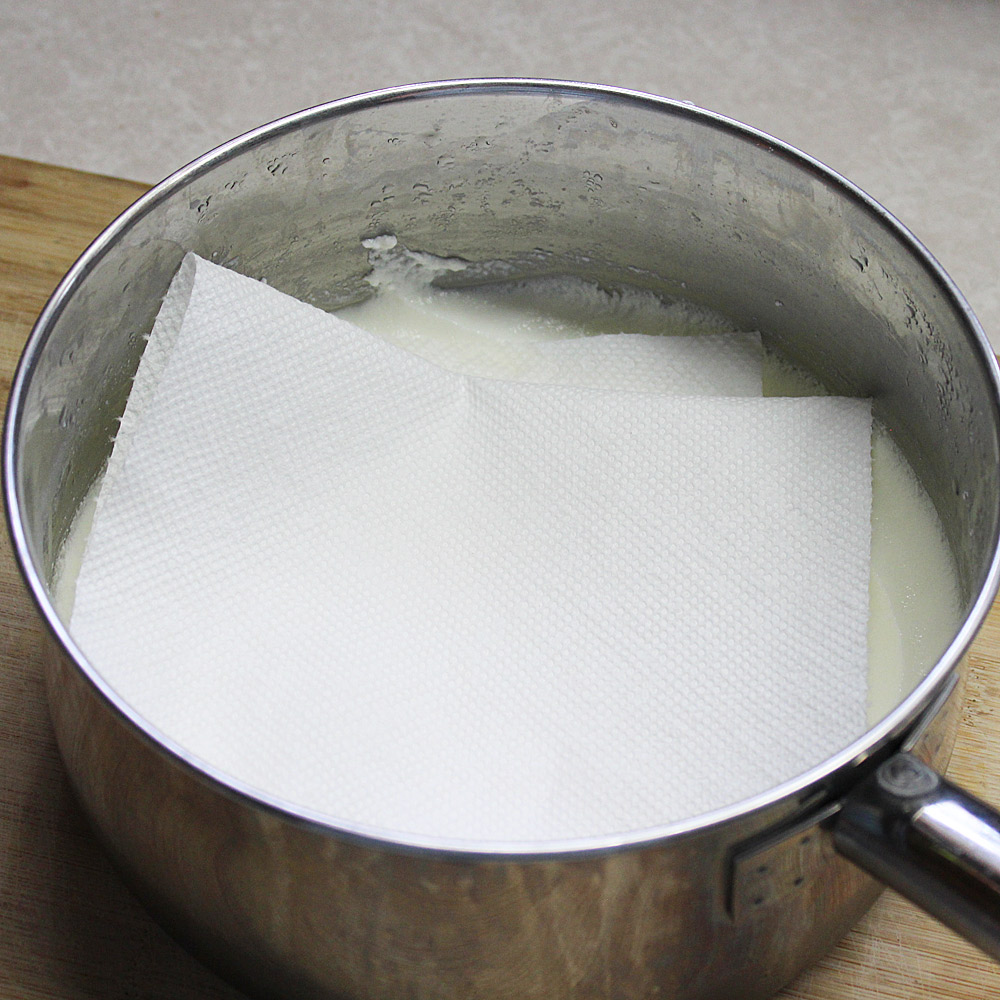
Take 2 tablespoons yogurt from the last batch or a store bought yogurt that has bacteria and drop into the middle of the warm milk and just wiggle it a little bit. Don’t stir up the whole pot. Let the pot sit in a warm place for around 8-10 hours. When you check it, it should have a firm topping of cream on top. Put paper towels gently on top to absorb the whey, put pot in the refrigerator, and change paper towels often. This process yields a nice thick Greek style yogurt.
That’s the short of it.
Now here’s the detailed version:
What you will need for a thick Greek style yogurt:
1 liter of 2% or whole milk
½ cup 18% or 35% cream
2 tablespoons yogurt starter (with bacteria)
Use a good size pot and fill it only ¾ full with the milk and cream, this allows room for the milk to froth and helps to prevent overflow.
Cook milk until it reaches a temperature of 180°F. If you do not have a thermometer, 180°F is the temperature at which milk starts to froth (foam).
The milk will rise up in the pot and froth as it heats. Cook at a medium heat, DO NOT BOIL and stir to prevent sticking or burning to bottom of pot. Cook on a wire trivet to help prevent burning. Some people use a double boiler. This all takes about 20 minutes to slowly reach 180°F. Cooking slow helps yield a thicker yogurt.
When milk reaches 180° Fahrenheit, remove from heat and let cool to a temperature of 110° Fahrenheit. Remove about a cup of warm milk from the pot and stir in the 2 tablespoons yogurt starter into the cup. Pour the milk and starter back into the pot and gently stir.
Put a lid on the pot and cover with a towel and place in a warm place. I put mine in the oven. I warmed up the oven a bit first then shut it off and left the oven light on. The light seems to give off a bit of heat. When I opened the oven door after 8 hours it was very warm inside. Do not disturb during this time. For a tarter taste leave yogurt in a warm place for up to 12 hours depending on how you like the taste.
After 8-12 hours remove lid and check for a firm top by gently pressing the top of your yogurt with your fingers. Pot the whole pot in the fridge to cool. While yogurt is chilling, a lot of whey (water) will form on top, you can pour this off and use it in other recipes for cooking or gently place paper towels on top of yogurt to soak up the whey. Change paper towels often.
After a few hours of cooling, yogurt is ready to eat. If the top is fattier than underneath, scrape this off and eat separately.
Yogurt will keep in the fridge for about a week.
*You’ll notice more whey (liquid) separate the longer it is left to set.
*Use higher-fat milk. The higher the fat content, the thicker the results.
*If you add the ‘starter yogurt’ too soon you will certainly kill it (if it’s too cold, it won’t incubate as well as it could)

Cook milk until 180°F is reached.

To soak up whey, lay paper towel over yogurt, change often.

Scoop out to serve.


